<?xml version="1.0" encoding="UTF-8"?><feed
	xmlns="http://www.w3.org/2005/Atom"
	xmlns:thr="http://purl.org/syndication/thread/1.0"
	xml:lang="vi"
	
	xmlns:georss="http://www.georss.org/georss"
	xmlns:geo="http://www.w3.org/2003/01/geo/wgs84_pos#"
	>
	<title type="text">Microsoft Edge 15 &#8211; BlogAnChoi</title>
	<subtitle type="text">Blog giải trí về du lịch, làm đẹp, quán ngon dành cho giới trẻ.</subtitle>

	<updated>2021-07-02T04:02:06Z</updated>

	<link rel="alternate" type="text/html" href="https://bloganchoi.com" />
	<id>https://bloganchoi.com/feed/atom/</id>
	<link rel="self" type="application/atom+xml" href="https://bloganchoi.com/tag/microsoft-edge-15/feed/atom/" />

	
	<entry>
		<author>
			<name>Dũng Nguyễn</name>
					</author>

		<title type="html"><![CDATA[Windows 11 có tính năng gì mới so với Windows 10, Windows 8.1 và macOS?]]></title>
		<link rel="alternate" type="text/html" href="https://bloganchoi.com/windows-11-tinh-nang-moi-so-voi-windows-10-windows-8-1-va-macos/" />

		<id>https://bloganchoi.com/?p=395601</id>
		<updated>2021-07-02T04:02:06Z</updated>
		<published>2021-07-02T04:02:06Z</published>
		<category scheme="https://bloganchoi.com" term="Ứng dụng - Phần mềm" /><category scheme="https://bloganchoi.com" term="cách cài windows 11" /><category scheme="https://bloganchoi.com" term="cấu hình máy để cài windows 11" /><category scheme="https://bloganchoi.com" term="chính sách bảo mật" /><category scheme="https://bloganchoi.com" term="chip tpm" /><category scheme="https://bloganchoi.com" term="Cortana của Microsoft" /><category scheme="https://bloganchoi.com" term="giả lập trên windows" /><category scheme="https://bloganchoi.com" term="hệ điều hành MacOS" /><category scheme="https://bloganchoi.com" term="hệ điều hành windows" /><category scheme="https://bloganchoi.com" term="laptop MacOS" /><category scheme="https://bloganchoi.com" term="macos" /><category scheme="https://bloganchoi.com" term="macos bigsur" /><category scheme="https://bloganchoi.com" term="Microsoft" /><category scheme="https://bloganchoi.com" term="Microsoft Authenticator" /><category scheme="https://bloganchoi.com" term="Microsoft Edge" /><category scheme="https://bloganchoi.com" term="Microsoft Edge 15" /><category scheme="https://bloganchoi.com" term="Microsoft Flight Simulator" /><category scheme="https://bloganchoi.com" term="microsoft surface" /><category scheme="https://bloganchoi.com" term="multi-windows" /><category scheme="https://bloganchoi.com" term="phần mềm microsoft" /><category scheme="https://bloganchoi.com" term="phương pháp bảo mật" /><category scheme="https://bloganchoi.com" term="setting trên windows 10" /><category scheme="https://bloganchoi.com" term="start menu" /><category scheme="https://bloganchoi.com" term="surface windows" /><category scheme="https://bloganchoi.com" term="tính năng" /><category scheme="https://bloganchoi.com" term="trình duyệt Microsoft Edge" /><category scheme="https://bloganchoi.com" term="ứng dụng" /><category scheme="https://bloganchoi.com" term="vấn đề bảo mật" /><category scheme="https://bloganchoi.com" term="windows 10" /><category scheme="https://bloganchoi.com" term="Windows 11" /><category scheme="https://bloganchoi.com" term="windows 7" /><category scheme="https://bloganchoi.com" term="Windows 8" /><category scheme="https://bloganchoi.com" term="Windows Store" />
		<summary type="html"><![CDATA[Tối ngày 24/06/2021 (theo giờ Việt Nam), Microsoft đã chính thức ra mắt Windows 11 với nhiều cải tiến mới. Vậy là sau 5 năm kể từ Windows 10, Microsoft đã đem tới người dùng một phiên bản Windows tốt hơn, mở hơn. Trong bài viết này, BlogAnChoi sẽ tổng hợp lại những điểm thay]]></summary>

					<content type="html" xml:base="https://bloganchoi.com/windows-11-tinh-nang-moi-so-voi-windows-10-windows-8-1-va-macos/"><![CDATA[<p><strong>Tối ngày 24/06/2021 (theo giờ Việt Nam), Microsoft đã chính thức ra mắt Windows 11 với nhiều cải tiến mới. Vậy là sau 5 năm kể từ Windows 10, Microsoft đã đem tới người dùng một phiên bản Windows tốt hơn, mở hơn. Trong bài viết này, BlogAnChoi sẽ tổng hợp lại những điểm thay đổi trên Windows 11 so với hai &#8220;người tiền nhiệm&#8221; Windows 8.1 và Windows 10, nhằm giúp <strong><a href="https://bloganchoi.com/tin/ban-doc/"  target="_bank"   title="bạn đọc">bạn đọc</a></strong> có thêm thông tin để quyết định có nên nâng cấp máy tính của mình lên phiên bản Windows mới nhất này hay không.</strong></p>
<p><span id="more-395601"></span></p>
<figure id="attachment_395622" aria-describedby="caption-attachment-395622" style="width: 1024px" class="wp-caption aligncenter"><img loading="lazy" class="wp-image-395622 size-full" title="Windows 11 đi kèm với Start Menu hoàn toàn mới (Ảnh: Internet)." src="https://bloganchoi.com/wp-content/uploads/2021/06/windows-11-tinh-nang-moi-01.jpg" alt="Windows 11 đi kèm với Start Menu hoàn toàn mới (Ảnh: Internet)." width="1024" height="576" srcset="https://bloganchoi.com/wp-content/uploads/2021/06/windows-11-tinh-nang-moi-01.jpg 1024w, https://bloganchoi.com/wp-content/uploads/2021/06/windows-11-tinh-nang-moi-01-300x169.jpg 300w, https://bloganchoi.com/wp-content/uploads/2021/06/windows-11-tinh-nang-moi-01-768x432.jpg 768w, https://bloganchoi.com/wp-content/uploads/2021/06/windows-11-tinh-nang-moi-01-696x392.jpg 696w, https://bloganchoi.com/wp-content/uploads/2021/06/windows-11-tinh-nang-moi-01-747x420.jpg 747w" sizes="(max-width: 1024px) 100vw, 1024px" /><figcaption id="caption-attachment-395622" class="wp-caption-text">Windows 11 đi kèm với Start Menu hoàn toàn mới (Ảnh: Internet).</figcaption></figure>
<h2><strong>1. Windows 11 có Start Menu mới</strong></h2>
<p>
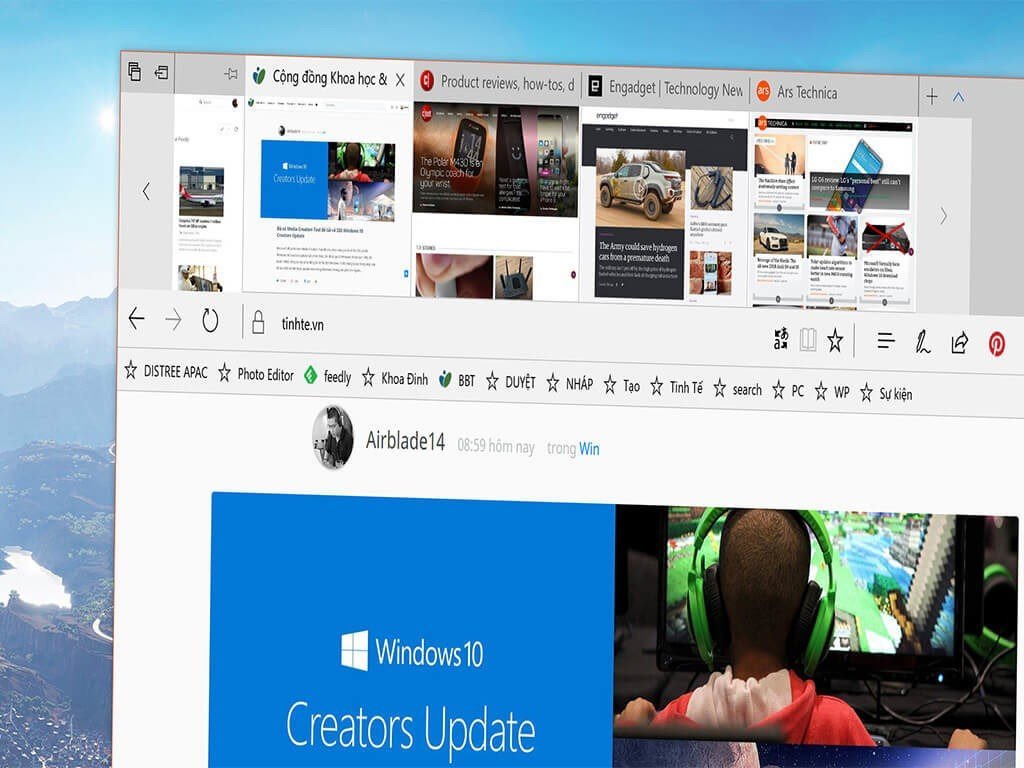
Đập vào mắt người dùng trên Windows 11 đó chính là Start Menu. Kể từ Windows 8.1 hay Windows 10, Microsoft đã cố gắng lồng ghép nhiều tính năng vào Start Menu nhằm tăng sự tương tác cũng như trải nghiệm người dùng, song không phải cải tiến nào cũng đáng giá.</p>
<figure id="attachment_395627" aria-describedby="caption-attachment-395627" style="width: 1920px" class="wp-caption aligncenter"><img loading="lazy" class="wp-image-395627 size-full" title="Start Menu trên Windows 8.1. Người dùng thường hay đùa vui rằng đây là Start Screen chứ không phải Start Menu mà họ muốn. (Ảnh: Internet)" src="https://bloganchoi.com/wp-content/uploads/2021/06/windows-11-windows-8-1-start-menu.jpg" alt="Start Menu trên Windows 8.1. Người dùng thường hay đùa vui rằng đây là Start Screen chứ không phải Start Menu mà họ muốn. (Ảnh: Internet)" width="1920" height="1080" srcset="https://bloganchoi.com/wp-content/uploads/2021/06/windows-11-windows-8-1-start-menu.jpg 1920w, https://bloganchoi.com/wp-content/uploads/2021/06/windows-11-windows-8-1-start-menu-300x169.jpg 300w, https://bloganchoi.com/wp-content/uploads/2021/06/windows-11-windows-8-1-start-menu-1024x576.jpg 1024w, https://bloganchoi.com/wp-content/uploads/2021/06/windows-11-windows-8-1-start-menu-768x432.jpg 768w, https://bloganchoi.com/wp-content/uploads/2021/06/windows-11-windows-8-1-start-menu-1536x864.jpg 1536w, https://bloganchoi.com/wp-content/uploads/2021/06/windows-11-windows-8-1-start-menu-696x392.jpg 696w, https://bloganchoi.com/wp-content/uploads/2021/06/windows-11-windows-8-1-start-menu-1068x601.jpg 1068w, https://bloganchoi.com/wp-content/uploads/2021/06/windows-11-windows-8-1-start-menu-747x420.jpg 747w" sizes="(max-width: 1920px) 100vw, 1920px" /><figcaption id="caption-attachment-395627" class="wp-caption-text">Start Menu trên Windows 8.1. Người dùng thường hay đùa vui rằng đây là Start Screen chứ không phải Start Menu mà họ muốn. (Ảnh: Internet)</figcaption></figure>
<p>Trên Windows 8.1, người dùng thường xuyên kêu ca về việc họ chỉ có Start Screen chứ không phải Start Menu thực sự. Hoạt động thiếu ổn định đi kèm với giao diện khá rối mắt khiến Start Screen thực sự là một điểm trừ lớn của phiên bản Windows 8.1 vốn đã thiếu sự ổn định so với Windows 7.</p>
<p><iframe loading="lazy" class="youtube-player" width="640" height="360" src="https://www.youtube.com/embed/_KY3y3SdPWg?version=3&#038;rel=1&#038;showsearch=0&#038;showinfo=1&#038;iv_load_policy=1&#038;fs=1&#038;hl=vi&#038;autohide=2&#038;wmode=transparent" allowfullscreen="true" style="border:0;" sandbox="allow-scripts allow-same-origin allow-popups allow-presentation"></iframe></p>
<figure id="attachment_395633" aria-describedby="caption-attachment-395633" style="width: 1200px" class="wp-caption aligncenter"><img loading="lazy" class="wp-image-395633 size-full" title="Start Menu trên Windows 10: bạn sẽ phải tốn thời gian để tinh chỉnh lại nếu muốn Start Menu của mình đỡ lộn xộn hơn (Ảnh: Internet)." src="https://bloganchoi.com/wp-content/uploads/2021/06/windows-11-windows-10-start-menu-1.jpg" alt="Start Menu trên Windows 10: bạn sẽ phải tốn thời gian để tinh chỉnh lại nếu muốn Start Menu của mình đỡ lộn xộn hơn (Ảnh: Internet)." width="1200" height="675" srcset="https://bloganchoi.com/wp-content/uploads/2021/06/windows-11-windows-10-start-menu-1.jpg 1200w, https://bloganchoi.com/wp-content/uploads/2021/06/windows-11-windows-10-start-menu-1-300x169.jpg 300w, https://bloganchoi.com/wp-content/uploads/2021/06/windows-11-windows-10-start-menu-1-1024x576.jpg 1024w, https://bloganchoi.com/wp-content/uploads/2021/06/windows-11-windows-10-start-menu-1-768x432.jpg 768w, https://bloganchoi.com/wp-content/uploads/2021/06/windows-11-windows-10-start-menu-1-696x392.jpg 696w, https://bloganchoi.com/wp-content/uploads/2021/06/windows-11-windows-10-start-menu-1-1068x601.jpg 1068w, https://bloganchoi.com/wp-content/uploads/2021/06/windows-11-windows-10-start-menu-1-747x420.jpg 747w" sizes="(max-width: 1200px) 100vw, 1200px" /><figcaption id="caption-attachment-395633" class="wp-caption-text">Start Menu trên Windows 10: bạn sẽ phải tốn thời gian để tinh chỉnh lại nếu muốn Start Menu của mình đỡ lộn xộn hơn (Ảnh: Internet).</figcaption></figure>
<p>Ở Windows 11, người dùng sẽ thấy một Start Menu gọn gàng, chi tiết. Bạn có thể ghim những ứng dụng thường xuyên sử dụng và truy cập nhanh đến chúng. So với Windows 8.1 hay Windows 10, đây chính là một điểm cộng khiến người dùng muốn nâng cấp lên Windows 11.</p>
<figure id="attachment_396404" aria-describedby="caption-attachment-396404" style="width: 1369px" class="wp-caption aligncenter"><img loading="lazy" class="wp-image-396404 size-full" title="Start Menu trên Windows 11 (Ảnh: Internet)." src="https://bloganchoi.com/wp-content/uploads/2021/06/windows-11-start-menu-1.jpg" alt="Start Menu trên Windows 11 (Ảnh: Internet)." width="1369" height="839" srcset="https://bloganchoi.com/wp-content/uploads/2021/06/windows-11-start-menu-1.jpg 1369w, https://bloganchoi.com/wp-content/uploads/2021/06/windows-11-start-menu-1-300x184.jpg 300w, https://bloganchoi.com/wp-content/uploads/2021/06/windows-11-start-menu-1-1024x628.jpg 1024w, https://bloganchoi.com/wp-content/uploads/2021/06/windows-11-start-menu-1-768x471.jpg 768w, https://bloganchoi.com/wp-content/uploads/2021/06/windows-11-start-menu-1-696x427.jpg 696w, https://bloganchoi.com/wp-content/uploads/2021/06/windows-11-start-menu-1-1068x655.jpg 1068w, https://bloganchoi.com/wp-content/uploads/2021/06/windows-11-start-menu-1-685x420.jpg 685w" sizes="(max-width: 1369px) 100vw, 1369px" /><figcaption id="caption-attachment-396404" class="wp-caption-text">Start Menu trên Windows 11 (Ảnh: Internet).</figcaption></figure>
<figure id="attachment_395636" aria-describedby="caption-attachment-395636" style="width: 2560px" class="wp-caption aligncenter"><img loading="lazy" class="wp-image-395636 size-full" title="Nhiều người cho rằng Start Menu trên Windows 11 khá tương đồng với Dock Menu trên macOS (Ảnh: Internet)." src="https://bloganchoi.com/wp-content/uploads/2021/06/windows-11-dock-menu-macos-scaled.jpg" alt="Nhiều người cho rằng Start Menu trên Windows 11 khá tương đồng với Dock Menu trên macOS (Ảnh: Internet)." width="2560" height="693" srcset="https://bloganchoi.com/wp-content/uploads/2021/06/windows-11-dock-menu-macos-scaled.jpg 2560w, https://bloganchoi.com/wp-content/uploads/2021/06/windows-11-dock-menu-macos-300x81.jpg 300w, https://bloganchoi.com/wp-content/uploads/2021/06/windows-11-dock-menu-macos-1024x277.jpg 1024w, https://bloganchoi.com/wp-content/uploads/2021/06/windows-11-dock-menu-macos-768x208.jpg 768w, https://bloganchoi.com/wp-content/uploads/2021/06/windows-11-dock-menu-macos-1536x416.jpg 1536w, https://bloganchoi.com/wp-content/uploads/2021/06/windows-11-dock-menu-macos-2048x555.jpg 2048w, https://bloganchoi.com/wp-content/uploads/2021/06/windows-11-dock-menu-macos-696x189.jpg 696w, https://bloganchoi.com/wp-content/uploads/2021/06/windows-11-dock-menu-macos-1068x289.jpg 1068w, https://bloganchoi.com/wp-content/uploads/2021/06/windows-11-dock-menu-macos-1551x420.jpg 1551w" sizes="(max-width: 2560px) 100vw, 2560px" /><figcaption id="caption-attachment-395636" class="wp-caption-text">Nhiều người cho rằng Start Menu trên Windows 11 khá tương đồng với Dock Menu trên macOS (Ảnh: Internet).</figcaption></figure>
<h2><strong>2. Windows 11 không cho di chuyển Task Bar</strong></h2>
<p>So với macOS, người dùng Windows luôn có một sự “tự do” hơn nhất định. Họ có thể thoải mái tuỳ chỉnh hệ điều hành mình sử dụng ở mọi khía cạnh: từ giao diện cho đến những thiết lập ảnh hưởng đến sự vận hành của hệ thống. Một trong những điều đó là khả năng di chuyển thanh Taskbar từ trên, dưới, trái hay phải.</p>
<figure id="attachment_395642" aria-describedby="caption-attachment-395642" style="width: 1280px" class="wp-caption aligncenter"><img loading="lazy" class="wp-image-395642 size-full" title="Bốn vị trí mà người dùng có thể thoải mái &quot;xê dịch&quot; thanh Taskbar trên Windows 10 (Ảnh: Internet)." src="https://bloganchoi.com/wp-content/uploads/2021/06/windows-11-windows-10-taskbar.jpg" alt="Bốn vị trí mà người dùng có thể thoải mái &quot;xê dịch&quot; thanh Taskbar trên Windows 10 (Ảnh: Internet)." width="1280" height="720" srcset="https://bloganchoi.com/wp-content/uploads/2021/06/windows-11-windows-10-taskbar.jpg 1280w, https://bloganchoi.com/wp-content/uploads/2021/06/windows-11-windows-10-taskbar-300x169.jpg 300w, https://bloganchoi.com/wp-content/uploads/2021/06/windows-11-windows-10-taskbar-1024x576.jpg 1024w, https://bloganchoi.com/wp-content/uploads/2021/06/windows-11-windows-10-taskbar-768x432.jpg 768w, https://bloganchoi.com/wp-content/uploads/2021/06/windows-11-windows-10-taskbar-696x392.jpg 696w, https://bloganchoi.com/wp-content/uploads/2021/06/windows-11-windows-10-taskbar-1068x601.jpg 1068w, https://bloganchoi.com/wp-content/uploads/2021/06/windows-11-windows-10-taskbar-747x420.jpg 747w" sizes="(max-width: 1280px) 100vw, 1280px" /><figcaption id="caption-attachment-395642" class="wp-caption-text">Bốn vị trí mà người dùng có thể thoải mái &#8220;xê dịch&#8221; thanh Taskbar trên Windows 10 (Ảnh: Internet).</figcaption></figure>
<p>Tuy nhiên theo phản hồi của nhiều người dùng thì họ không thể di chuyển Task Bar trên Windows 11 một cách tuỳ ý như trên những phiên bản tiền nhiệm. Thanh Taskbar trên Windows 11 sẽ chỉ nằm cố định ở phía dưới cùng của góc màn hình. Hy vọng rằng ở những bản cập nhật trong tương lai Microsoft có thể khắc phục được điều này và cho phép người dùng tự do hơn trong việc đặt thanh Taskbar.</p>
<figure id="attachment_395622" aria-describedby="caption-attachment-395622" style="width: 1024px" class="wp-caption aligncenter"><img loading="lazy" class="wp-image-395622 size-full" title="Windows 11 có giao diện rất đẹp, chỉ là không cho thay đổi vị trí Taskbar mà thôi (Ảnh: Internet)." src="https://bloganchoi.com/wp-content/uploads/2021/06/windows-11-tinh-nang-moi-01.jpg" alt="Windows 11 có giao diện rất đẹp, chỉ là không cho thay đổi vị trí Taskbar mà thôi (Ảnh: Internet)." width="1024" height="576" srcset="https://bloganchoi.com/wp-content/uploads/2021/06/windows-11-tinh-nang-moi-01.jpg 1024w, https://bloganchoi.com/wp-content/uploads/2021/06/windows-11-tinh-nang-moi-01-300x169.jpg 300w, https://bloganchoi.com/wp-content/uploads/2021/06/windows-11-tinh-nang-moi-01-768x432.jpg 768w, https://bloganchoi.com/wp-content/uploads/2021/06/windows-11-tinh-nang-moi-01-696x392.jpg 696w, https://bloganchoi.com/wp-content/uploads/2021/06/windows-11-tinh-nang-moi-01-747x420.jpg 747w" sizes="(max-width: 1024px) 100vw, 1024px" /><figcaption id="caption-attachment-395622" class="wp-caption-text">Windows 11 có giao diện rất đẹp, chỉ là không cho thay đổi vị trí Taskbar mà thôi (Ảnh: Internet).</figcaption></figure>
<p><iframe loading="lazy" class="youtube-player" width="640" height="360" src="https://www.youtube.com/embed/cp6D8RzqgTQ?version=3&#038;rel=1&#038;showsearch=0&#038;showinfo=1&#038;iv_load_policy=1&#038;fs=1&#038;hl=vi&#038;autohide=2&#038;wmode=transparent" allowfullscreen="true" style="border:0;" sandbox="allow-scripts allow-same-origin allow-popups allow-presentation"></iframe></p>
<h2><strong>3. Task View của Windows 11 </strong></h2>
<p>Trên Windows 11, tính năng Task View đã được update và cải thiện. Việc tạo ra các desktop mới để làm việc đa tác vụ đã xuất hiện lần đầu ở Windows 10. Trên Windows 11, tính năng này được nhiều người dùng đánh giá là học hỏi đến &#8230;99% từ Mission Control, một trình quản lý đa tác vụ mặc định đến từ &#8220;đối thủ&#8221; macOS.</p>
<figure id="attachment_395650" aria-describedby="caption-attachment-395650" style="width: 1493px" class="wp-caption aligncenter"><img loading="lazy" class="wp-image-395650 size-full" title="Task View trên Windows 10. (Ảnh: Internet)" src="https://bloganchoi.com/wp-content/uploads/2021/06/windows-11-windows-10-task-view.jpg" alt="Task View trên Windows 10. (Ảnh: Internet)" width="1493" height="961" srcset="https://bloganchoi.com/wp-content/uploads/2021/06/windows-11-windows-10-task-view.jpg 1493w, https://bloganchoi.com/wp-content/uploads/2021/06/windows-11-windows-10-task-view-300x193.jpg 300w, https://bloganchoi.com/wp-content/uploads/2021/06/windows-11-windows-10-task-view-1024x659.jpg 1024w, https://bloganchoi.com/wp-content/uploads/2021/06/windows-11-windows-10-task-view-768x494.jpg 768w, https://bloganchoi.com/wp-content/uploads/2021/06/windows-11-windows-10-task-view-696x448.jpg 696w, https://bloganchoi.com/wp-content/uploads/2021/06/windows-11-windows-10-task-view-1068x687.jpg 1068w, https://bloganchoi.com/wp-content/uploads/2021/06/windows-11-windows-10-task-view-653x420.jpg 653w" sizes="(max-width: 1493px) 100vw, 1493px" /><figcaption id="caption-attachment-395650" class="wp-caption-text">Task View trên Windows 10. (Ảnh: Internet)</figcaption></figure>
<figure id="attachment_395651" aria-describedby="caption-attachment-395651" style="width: 1651px" class="wp-caption aligncenter"><img loading="lazy" class="wp-image-395651 size-full" title="Task View trên Windows 11: Tính năng này giúp người dùng phân chia từng Desktop riêng cho một công việc hoặc ứng dụng cụ thể. (Ảnh: Internet)" src="https://bloganchoi.com/wp-content/uploads/2021/06/windows-11-task-view.jpg" alt="Task View trên Windows 11: Tính năng này giúp người dùng phân chia từng Desktop riêng cho một công việc hoặc ứng dụng cụ thể. (Ảnh: Internet)" width="1651" height="931" srcset="https://bloganchoi.com/wp-content/uploads/2021/06/windows-11-task-view.jpg 1651w, https://bloganchoi.com/wp-content/uploads/2021/06/windows-11-task-view-300x169.jpg 300w, https://bloganchoi.com/wp-content/uploads/2021/06/windows-11-task-view-1024x577.jpg 1024w, https://bloganchoi.com/wp-content/uploads/2021/06/windows-11-task-view-768x433.jpg 768w, https://bloganchoi.com/wp-content/uploads/2021/06/windows-11-task-view-1536x866.jpg 1536w, https://bloganchoi.com/wp-content/uploads/2021/06/windows-11-task-view-696x392.jpg 696w, https://bloganchoi.com/wp-content/uploads/2021/06/windows-11-task-view-1068x602.jpg 1068w, https://bloganchoi.com/wp-content/uploads/2021/06/windows-11-task-view-745x420.jpg 745w" sizes="(max-width: 1651px) 100vw, 1651px" /><figcaption id="caption-attachment-395651" class="wp-caption-text">Task View trên Windows 11: Tính năng này giúp người dùng phân chia từng Desktop riêng cho một công việc hoặc ứng dụng cụ thể. (Ảnh: Internet)</figcaption></figure>
<figure id="attachment_395652" aria-describedby="caption-attachment-395652" style="width: 1560px" class="wp-caption aligncenter"><img loading="lazy" class="wp-image-395652 size-full" title="Những người từng sử dụng qua cả 2 hệ điều hành sẽ không khó để nhận ra sự tương đồng giữa Mission Control của macOS so với Task View của Windows 11 (Ảnh: Internet)." src="https://bloganchoi.com/wp-content/uploads/2021/06/windows-11-mission-control-macos.jpg" alt="Những người từng sử dụng qua cả 2 hệ điều hành sẽ không khó để nhận ra sự tương đồng giữa Mission Control của macOS so với Task View của Windows 11 (Ảnh: Internet)." width="1560" height="950" srcset="https://bloganchoi.com/wp-content/uploads/2021/06/windows-11-mission-control-macos.jpg 1560w, https://bloganchoi.com/wp-content/uploads/2021/06/windows-11-mission-control-macos-300x183.jpg 300w, https://bloganchoi.com/wp-content/uploads/2021/06/windows-11-mission-control-macos-1024x624.jpg 1024w, https://bloganchoi.com/wp-content/uploads/2021/06/windows-11-mission-control-macos-768x468.jpg 768w, https://bloganchoi.com/wp-content/uploads/2021/06/windows-11-mission-control-macos-1536x935.jpg 1536w, https://bloganchoi.com/wp-content/uploads/2021/06/windows-11-mission-control-macos-696x424.jpg 696w, https://bloganchoi.com/wp-content/uploads/2021/06/windows-11-mission-control-macos-1068x650.jpg 1068w, https://bloganchoi.com/wp-content/uploads/2021/06/windows-11-mission-control-macos-690x420.jpg 690w" sizes="(max-width: 1560px) 100vw, 1560px" /><figcaption id="caption-attachment-395652" class="wp-caption-text">Những người từng sử dụng qua cả 2 hệ điều hành sẽ không khó để nhận ra sự tương đồng giữa Mission Control của macOS so với Task View của Windows 11 (Ảnh: Internet).</figcaption></figure>
<p><iframe loading="lazy" class="youtube-player" width="640" height="360" src="https://www.youtube.com/embed/uBYP5IdfoCo?version=3&#038;rel=1&#038;showsearch=0&#038;showinfo=1&#038;iv_load_policy=1&#038;fs=1&#038;hl=vi&#038;autohide=2&#038;wmode=transparent" allowfullscreen="true" style="border:0;" sandbox="allow-scripts allow-same-origin allow-popups allow-presentation"></iframe></p>
<h2><strong>4. Màn hình cài đặt của Windows 11 </strong></h2>
<p>Trên Windows 7, Windows 8.1 hay Windows 10, Microsoft thường sử dụng tông màu khá tối ở màn hình thiết lập cài đặt. Nhưng ở Windows 11, Microsoft lại chủ động chỉnh tông màu phần thiết lập sáng sủa hơn. Ngôn ngữ thiết kế này khá tương đồng với macOS Big Sur, khi mà thiết kế mô phỏng đồ vật đã được thay thế bằng giao diện màu sắc sặc sỡ.</p>
<figure id="attachment_395655" aria-describedby="caption-attachment-395655" style="width: 1026px" class="wp-caption aligncenter"><img loading="lazy" class="wp-image-395655 size-full" title="Giao diện thiết lập cài đặt trên Windows 10 khá tối và tù túng. (Ảnh: Internet)" src="https://bloganchoi.com/wp-content/uploads/2021/06/windows-11-windows-10-setting.jpg" alt="Giao diện thiết lập cài đặt trên Windows 10 khá tối và tù túng. (Ảnh: Internet)" width="1026" height="764" srcset="https://bloganchoi.com/wp-content/uploads/2021/06/windows-11-windows-10-setting.jpg 1026w, https://bloganchoi.com/wp-content/uploads/2021/06/windows-11-windows-10-setting-300x223.jpg 300w, https://bloganchoi.com/wp-content/uploads/2021/06/windows-11-windows-10-setting-1024x763.jpg 1024w, https://bloganchoi.com/wp-content/uploads/2021/06/windows-11-windows-10-setting-768x572.jpg 768w, https://bloganchoi.com/wp-content/uploads/2021/06/windows-11-windows-10-setting-80x60.jpg 80w, https://bloganchoi.com/wp-content/uploads/2021/06/windows-11-windows-10-setting-265x198.jpg 265w, https://bloganchoi.com/wp-content/uploads/2021/06/windows-11-windows-10-setting-696x518.jpg 696w, https://bloganchoi.com/wp-content/uploads/2021/06/windows-11-windows-10-setting-564x420.jpg 564w" sizes="(max-width: 1026px) 100vw, 1026px" /><figcaption id="caption-attachment-395655" class="wp-caption-text">Giao diện thiết lập cài đặt trên Windows 10 khá tối và tù túng. (Ảnh: Internet)</figcaption></figure>
<figure id="attachment_395654" aria-describedby="caption-attachment-395654" style="width: 960px" class="wp-caption aligncenter"><img loading="lazy" class="wp-image-395654 size-full" title="Màn hình thiết lập ban đầu trên Windows 11. Lối thiết kế này, trùng hợp thay, lại khá tương đồng với... (Ảnh: Internet)" src="https://bloganchoi.com/wp-content/uploads/2021/06/windows-11-country-region-setting.jpg" alt="Màn hình thiết lập ban đầu trên Windows 11. Lối thiết kế này, trùng hợp thay, lại khá tương đồng với... (Ảnh: Internet)" width="960" height="720" srcset="https://bloganchoi.com/wp-content/uploads/2021/06/windows-11-country-region-setting.jpg 960w, https://bloganchoi.com/wp-content/uploads/2021/06/windows-11-country-region-setting-300x225.jpg 300w, https://bloganchoi.com/wp-content/uploads/2021/06/windows-11-country-region-setting-768x576.jpg 768w, https://bloganchoi.com/wp-content/uploads/2021/06/windows-11-country-region-setting-80x60.jpg 80w, https://bloganchoi.com/wp-content/uploads/2021/06/windows-11-country-region-setting-265x198.jpg 265w, https://bloganchoi.com/wp-content/uploads/2021/06/windows-11-country-region-setting-696x522.jpg 696w, https://bloganchoi.com/wp-content/uploads/2021/06/windows-11-country-region-setting-560x420.jpg 560w" sizes="(max-width: 960px) 100vw, 960px" /><figcaption id="caption-attachment-395654" class="wp-caption-text">Màn hình thiết lập ban đầu trên Windows 11. Lối thiết kế này, trùng hợp thay, lại khá tương đồng với&#8230; (Ảnh: Internet)</figcaption></figure>
<figure id="attachment_395656" aria-describedby="caption-attachment-395656" style="width: 2048px" class="wp-caption aligncenter"><img loading="lazy" class="wp-image-395656 size-full" title="...màn hình thiết lập của macOS Big Sur (Ảnh: Internet)." src="https://bloganchoi.com/wp-content/uploads/2021/06/windows-11-big-sur-screen-4.jpg" alt="...màn hình thiết lập của macOS Big Sur (Ảnh: Internet)." width="2048" height="1280" srcset="https://bloganchoi.com/wp-content/uploads/2021/06/windows-11-big-sur-screen-4.jpg 2048w, https://bloganchoi.com/wp-content/uploads/2021/06/windows-11-big-sur-screen-4-300x188.jpg 300w, https://bloganchoi.com/wp-content/uploads/2021/06/windows-11-big-sur-screen-4-1024x640.jpg 1024w, https://bloganchoi.com/wp-content/uploads/2021/06/windows-11-big-sur-screen-4-768x480.jpg 768w, https://bloganchoi.com/wp-content/uploads/2021/06/windows-11-big-sur-screen-4-1536x960.jpg 1536w, https://bloganchoi.com/wp-content/uploads/2021/06/windows-11-big-sur-screen-4-696x435.jpg 696w, https://bloganchoi.com/wp-content/uploads/2021/06/windows-11-big-sur-screen-4-1068x668.jpg 1068w, https://bloganchoi.com/wp-content/uploads/2021/06/windows-11-big-sur-screen-4-672x420.jpg 672w" sizes="(max-width: 2048px) 100vw, 2048px" /><figcaption id="caption-attachment-395656" class="wp-caption-text">&#8230;màn hình thiết lập của macOS Big Sur (Ảnh: Internet).</figcaption></figure>
<p><iframe loading="lazy" class="youtube-player" width="640" height="360" src="https://www.youtube.com/embed/zLG5zgu9DqQ?version=3&#038;rel=1&#038;showsearch=0&#038;showinfo=1&#038;iv_load_policy=1&#038;fs=1&#038;hl=vi&#038;autohide=2&#038;wmode=transparent" allowfullscreen="true" style="border:0;" sandbox="allow-scripts allow-same-origin allow-popups allow-presentation"></iframe></p>
<h2><strong>5. Snap Layout của Windows 11</strong></h2>
<p>Từ trước đến nay, người dùng Windows sẽ phải căn chỉnh thủ công độ rộng của hai ứng dụng nếu muốn làm việc đa nhiệm. Điểm bất tiện này đã được cải thiện dần dần qua tính năng Task View trên Windows 10. Tuy vậy phải đến Windows 11 thì tính năng <em>Snap Layout</em> mới thật sự trở nên lợi hại. Giờ đây <em>Snap</em> <em>Layout</em> đã cho phép người dùng có thể làm việc đồng thời lên tới 4 ứng dụng cùng một lúc trên một màn hình.</p>
<figure id="attachment_396151" aria-describedby="caption-attachment-396151" style="width: 970px" class="wp-caption aligncenter"><img loading="lazy" class="wp-image-396151 size-full" title="Snap Layout trên Windows 11. Tuy đi sau đối thủ macOS đến 6 năm, Windows 11 vẫn đem lại trải nghiệm tuyệt vời hơn do hỗ trợ đồng thời tới 4 màn hình làm việc. (Ảnh: Internet)" src="https://bloganchoi.com/wp-content/uploads/2021/06/windows-11-snap-layout.jpeg" alt="Snap Layout trên Windows 11. Tuy đi sau đối thủ macOS đến 6 năm, Windows 11 vẫn đem lại trải nghiệm tuyệt vời hơn do hỗ trợ đồng thời tới 4 màn hình làm việc. (Ảnh: Internet)" width="970" height="546" srcset="https://bloganchoi.com/wp-content/uploads/2021/06/windows-11-snap-layout.jpeg 970w, https://bloganchoi.com/wp-content/uploads/2021/06/windows-11-snap-layout-300x169.jpeg 300w, https://bloganchoi.com/wp-content/uploads/2021/06/windows-11-snap-layout-768x432.jpeg 768w, https://bloganchoi.com/wp-content/uploads/2021/06/windows-11-snap-layout-696x392.jpeg 696w, https://bloganchoi.com/wp-content/uploads/2021/06/windows-11-snap-layout-746x420.jpeg 746w" sizes="(max-width: 970px) 100vw, 970px" /><figcaption id="caption-attachment-396151" class="wp-caption-text">Snap Layout trên Windows 11. Tuy đi sau đối thủ macOS đến 6 năm, Windows 11 vẫn đem lại trải nghiệm tuyệt vời hơn do hỗ trợ đồng thời tới 4 màn hình làm việc. (Ảnh: Internet)</figcaption></figure>
<p>So với Windows, macOS đã có tính năng tương tự mang tên Split View, được ra mắt trên OS X El Capitan (2015). Tuy đi sau macOS đến 6 năm ở tính năng này, người dùng Windows có thể cảm thấy tự hào về khoản làm việc đa nhiệm lên tới 4 màn hình, so với 2 của macOS.</p>
<p><iframe loading="lazy" class="youtube-player" width="640" height="360" src="https://www.youtube.com/embed/R_WpfsB9cao?version=3&#038;rel=1&#038;showsearch=0&#038;showinfo=1&#038;iv_load_policy=1&#038;fs=1&#038;hl=vi&#038;autohide=2&#038;wmode=transparent" allowfullscreen="true" style="border:0;" sandbox="allow-scripts allow-same-origin allow-popups allow-presentation"></iframe></p>
<figure id="attachment_396149" aria-describedby="caption-attachment-396149" style="width: 1500px" class="wp-caption aligncenter"><img loading="lazy" class="wp-image-396149 size-full" title="Tính năng Split View trên macOS được ra mắt lần đầu trên macOS X El Capitan (2015). Kể cả trên phiên bản macOS Montery vừa rồi, số lượng ứng dụng đa nhiệm tối đa vẫn chỉ là 2 (Ảnh: Internet)." src="https://bloganchoi.com/wp-content/uploads/2021/06/windows-11-macos-split-view.jpg" alt="Tính năng Split View trên macOS được ra mắt lần đầu trên macOS X El Capitan (2015). Kể cả trên phiên bản macOS Montery vừa rồi, số lượng ứng dụng đa nhiệm tối đa vẫn chỉ là 2 (Ảnh: Internet)." width="1500" height="843" srcset="https://bloganchoi.com/wp-content/uploads/2021/06/windows-11-macos-split-view.jpg 1500w, https://bloganchoi.com/wp-content/uploads/2021/06/windows-11-macos-split-view-300x169.jpg 300w, https://bloganchoi.com/wp-content/uploads/2021/06/windows-11-macos-split-view-1024x575.jpg 1024w, https://bloganchoi.com/wp-content/uploads/2021/06/windows-11-macos-split-view-768x432.jpg 768w, https://bloganchoi.com/wp-content/uploads/2021/06/windows-11-macos-split-view-696x391.jpg 696w, https://bloganchoi.com/wp-content/uploads/2021/06/windows-11-macos-split-view-1068x600.jpg 1068w, https://bloganchoi.com/wp-content/uploads/2021/06/windows-11-macos-split-view-747x420.jpg 747w" sizes="(max-width: 1500px) 100vw, 1500px" /><figcaption id="caption-attachment-396149" class="wp-caption-text">Tính năng Split View trên macOS được ra mắt lần đầu trên macOS X El Capitan (2015). Kể cả trên phiên bản macOS Montery vừa rồi, số lượng ứng dụng đa nhiệm tối đa vẫn chỉ là 2 (Ảnh: Internet).</figcaption></figure>
<h2><strong>6. Windows 11 cho phép chạy native ứng dụng Android </strong></h2>
<p>Một trong những tính năng vô cùng hấp dẫn được chờ đón trên Windows 11 là khả năng chạy ứng dụng Android trực tiếp mà không cần thông qua bất kỳ bên thứ 3 nào. Tuy nhiên thay vì tải trực tiếp ứng dụng từ Google Play, Microsoft đã &#8220;bắt tay&#8221; với Amazon AppStore để tích hợp tài nguyên có sẵn vào kho ứng dụng Microsoft Store. Bạn cần phải có tài khoản Amazon để có thể cài đặt ứng dụng Android trên Windows 11.</p>
<p><iframe loading="lazy" class="youtube-player" width="640" height="360" src="https://www.youtube.com/embed/hfXXMGei4Ys?version=3&#038;rel=1&#038;showsearch=0&#038;showinfo=1&#038;iv_load_policy=1&#038;fs=1&#038;hl=vi&#038;autohide=2&#038;wmode=transparent" allowfullscreen="true" style="border:0;" sandbox="allow-scripts allow-same-origin allow-popups allow-presentation"></iframe></p>
<p>Theo thông tin nội bộ, bạn hoàn toàn có thể cài đặt file APK trực tiếp lên Windows 11 mà không phải thông qua Microsoft Store hay Amazon Appstore. Tính năng này hiện vẫn chưa có mặt trên phiên bản Windows 11 hiện tại, nhưng sẽ được sớm ra mắt trong phiên bản chính thức.</p>
<p><iframe loading="lazy" class="youtube-player" width="640" height="360" src="https://www.youtube.com/embed/9ul3kuxwgwE?version=3&#038;rel=1&#038;showsearch=0&#038;showinfo=1&#038;iv_load_policy=1&#038;fs=1&#038;hl=vi&#038;autohide=2&#038;wmode=transparent" allowfullscreen="true" style="border:0;" sandbox="allow-scripts allow-same-origin allow-popups allow-presentation"></iframe></p>
<p>Cả macOS và Windows 11 đã đều phát triển khả năng chạy ứng dụng di động ngay trên nền tảng PC. Tuy nhiên chúng ta vẫn phải chờ đợi thêm thời gian nữa mới có thể thực sự có một trải nghiệm hoàn hảo về việc chạy ứng dụng iOS/Android trên PC hoặc laptop của mình.</p>
<p><strong>Mời bạn xem thêm những bài viết liên quan của BlogAnChoi:</strong></p>
<ul>
<li><a href="https://bloganchoi.com/nhung-ly-do-windows-10-van-con-giu-lai-control-panel/"><strong>Vì sao Windows 10 vẫn còn giữ lại Control Panel?</strong></a></li>
<li><a href="https://bloganchoi.com/macbook-la-gi-thong-tin-co-ban-ve-laptop-macbook-apple/#:~:text=MacBook%20l%C3%A0%20d%C3%B2ng%20s%E1%BA%A3n%20ph%E1%BA%A9m,(%E1%BA%A2nh%3A%20Internet)."><strong>Macbook là gì? Macbook rẻ hay đắt? Macbook Air, Macbook Pro là gì?</strong></a></li>
<li><a href="https://bloganchoi.com/mac-pro-ban-cao-cap-nhat-co-gia-52-600-usd/"><strong>Mac Pro &#8220;không dành cho người sợ lỗ&#8221; giá hơn 1 tỉ, có gì mà đắt đến như vậy?</strong></a></li>
</ul>
<p>Hãy đón xem BlogAnChoi mỗi ngày để nhận được nhiều thông tin thú vị cho cuộc sống bạn nhé!</p>]]></content>
		
					<link rel="replies" type="text/html" href="https://bloganchoi.com/windows-11-tinh-nang-moi-so-voi-windows-10-windows-8-1-va-macos/#comments" thr:count="0" />
			<link rel="replies" type="application/atom+xml" href="https://bloganchoi.com/windows-11-tinh-nang-moi-so-voi-windows-10-windows-8-1-va-macos/feed/atom/" thr:count="0" />
			<thr:total>0</thr:total>
			</entry>
		<entry>
		<author>
			<name>Quangsumi</name>
					</author>

		<title type="html"><![CDATA[Trình duyệt Microsoft Edge 15 có thêm nhiều tính năng mới]]></title>
		<link rel="alternate" type="text/html" href="https://bloganchoi.com/trinh-duyet-microsoft-edge-15-co-them-nhieu-tinh-nang-moi/" />

		<id>https://bloganchoi.com/?p=42092</id>
		<updated>2017-04-08T11:09:06Z</updated>
		<published>2017-04-08T11:09:06Z</published>
		<category scheme="https://bloganchoi.com" term="Ứng dụng - Phần mềm" /><category scheme="https://bloganchoi.com" term="Microsoft" /><category scheme="https://bloganchoi.com" term="Microsoft Edge" /><category scheme="https://bloganchoi.com" term="Microsoft Edge 15" /><category scheme="https://bloganchoi.com" term="Set aside" /><category scheme="https://bloganchoi.com" term="tab" /><category scheme="https://bloganchoi.com" term="Tab preview" /><category scheme="https://bloganchoi.com" term="tính năng" /><category scheme="https://bloganchoi.com" term="trình duyệt" /><category scheme="https://bloganchoi.com" term="windows 10" /><category scheme="https://bloganchoi.com" term="Windows 10 Creators" />
		<summary type="html"><![CDATA[Microsoft Edge 15 được cập nhập khá nhiều tính năng mới so với phiên bản trước. Các tính năng này là những bổ sung kịp thời của Microsoft giúp tăng trải nghiệm người dùng đáng kể khi sử dụng trình duyệt này. Người dùng Internet mới đây lại rộ lên khi có thông tin hãng]]></summary>

					<content type="html" xml:base="https://bloganchoi.com/trinh-duyet-microsoft-edge-15-co-them-nhieu-tinh-nang-moi/"><![CDATA[<p><b>Microsoft Edge 15 được cập nhập khá nhiều tính năng mới so với phiên bản trước. Các tính năng này là những bổ sung kịp thời của Microsoft giúp tăng trải nghiệm người dùng đáng kể khi sử dụng trình duyệt này.</b></p>
<p><span id="more-42092"></span></p>
<figure id="attachment_42093" aria-describedby="caption-attachment-42093" style="width: 640px" class="wp-caption aligncenter"><img loading="lazy" class="size-large wp-image-42093" src="https://bloganchoi.com/wp-content/uploads/2017/04/microsoft-edge-15-1024x768.jpg" alt="Trình duyệt Microsoft Edge 15" width="640" height="480" srcset="https://bloganchoi.com/wp-content/uploads/2017/04/microsoft-edge-15.jpg 1024w, https://bloganchoi.com/wp-content/uploads/2017/04/microsoft-edge-15-300x225.jpg 300w, https://bloganchoi.com/wp-content/uploads/2017/04/microsoft-edge-15-768x576.jpg 768w, https://bloganchoi.com/wp-content/uploads/2017/04/microsoft-edge-15-80x60.jpg 80w, https://bloganchoi.com/wp-content/uploads/2017/04/microsoft-edge-15-265x198.jpg 265w, https://bloganchoi.com/wp-content/uploads/2017/04/microsoft-edge-15-696x522.jpg 696w, https://bloganchoi.com/wp-content/uploads/2017/04/microsoft-edge-15-560x420.jpg 560w" sizes="(max-width: 640px) 100vw, 640px" /><figcaption id="caption-attachment-42093" class="wp-caption-text">Trình duyệt Microsoft Edge 15 được cập nhập khá nhiều tính năng mới so với phiên bản trước (ảnh: Tinhte)</figcaption></figure>
<p><span style="font-weight: 400;">Người dùng Internet mới đây lại rộ lên khi có thông tin hãng </span><span style="font-weight: 400;">Microsoft </span><span style="font-weight: 400;">chuẩn bị cập nhập hệ điều hành Windows của mình với cái tên </span><span style="font-weight: 400;">Windows 10 Creators. Rất nhiều tính năng mới được người dùng mong chờ trên phiên bản Windows này và trong số đó phải kể đến những cải tiến trên trình duyệt Microsoft Edge 15. Đã có rất nhiều người được trải nghiêm các tính năng mới của trình duyệt này. Hãy cùng BlogAnChoi điểm mặt qua những tính năng mà Microsoft đã bổ sung trên phiên bản </span><span style="font-weight: 400;">Microsoft Edge 15 lần này nhé!</span></p>
<p><em><strong>Mời bạn đọc xem bài viết: <a href="https://bloganchoi.com/bo-google-chrome-di-trinh-duyet-microsoft-edge-moi-la-tot-nhat/#gsc.tab=0">Bỏ Google Chrome đi, trình duyệt Microsoft Edge mới là tốt nhất</a></strong></em></p>
<h2><b>Tính năng </b><b>Set aside</b></h2>
<p><span style="font-weight: 400;">Set aside (đặt sang một bên) là tính năng mới liên quan tới hệ thống quản lý Tab trên </span><span style="font-weight: 400;">Microsoft Edge 15</span><span style="font-weight: 400;">. Nói một cách đơn giản, tính năng này sẽ giúp bạn gom nhiều Tab thành một nhóm nhằm giúp trình duyệt trở lên gọn gàng hơn. Nó sẽ đặc biệt hữu ích với những người hay có thói quen mở nhiều Tab khi lướt web.</span></p>
<figure id="attachment_42096" aria-describedby="caption-attachment-42096" style="width: 640px" class="wp-caption aligncenter"><img loading="lazy" class="size-full wp-image-42096" src="https://bloganchoi.com/wp-content/uploads/2017/04/microsoft-edge-set-aside-2.jpg" alt="Chế độ Set aside trên Microsoft Edge 15" width="640" height="480" srcset="https://bloganchoi.com/wp-content/uploads/2017/04/microsoft-edge-set-aside-2.jpg 640w, https://bloganchoi.com/wp-content/uploads/2017/04/microsoft-edge-set-aside-2-300x225.jpg 300w, https://bloganchoi.com/wp-content/uploads/2017/04/microsoft-edge-set-aside-2-80x60.jpg 80w, https://bloganchoi.com/wp-content/uploads/2017/04/microsoft-edge-set-aside-2-265x198.jpg 265w, https://bloganchoi.com/wp-content/uploads/2017/04/microsoft-edge-set-aside-2-560x420.jpg 560w" sizes="(max-width: 640px) 100vw, 640px" /><figcaption id="caption-attachment-42096" class="wp-caption-text">Set aside cho phép bạn gom nhiều Tab thành một nhóm nhằm giúp trình duyệt trở lên gọn gàng hơn (ảnh: Internet)</figcaption></figure>
<p><span style="font-weight: 400;">Để sử dụng tính năng này, bạn để ý góc bên trái </span><span style="font-weight: 400;">thanh Tab Bar xuất hiện hai icon mới, đây chính là hai phím để quản lý Tab kiểu mới. Với tất cả các Tab đang mở, bạn nhấn vào phím thứ hai từ trái qua để gom các Tab đó lại vào một khu vực gọi là “Tabs you&#8217;ve set aside”. Khu vực này là nhóm các Tab mà bạn tạm thời không muốn nhìn thấy trên thanh Tab Bar và có ý định dùng chúng sau. Phím còn lại dùng để khôi phúc các Tab đã được bạn Set aside.</span></p>
<figure id="attachment_42097" aria-describedby="caption-attachment-42097" style="width: 640px" class="wp-caption aligncenter"><img loading="lazy" class="size-full wp-image-42097" src="https://bloganchoi.com/wp-content/uploads/2017/04/set-aside-1.jpg" alt="Chế độ Set aside trên Microsoft Edge 15" width="640" height="480" srcset="https://bloganchoi.com/wp-content/uploads/2017/04/set-aside-1.jpg 640w, https://bloganchoi.com/wp-content/uploads/2017/04/set-aside-1-300x225.jpg 300w, https://bloganchoi.com/wp-content/uploads/2017/04/set-aside-1-80x60.jpg 80w, https://bloganchoi.com/wp-content/uploads/2017/04/set-aside-1-265x198.jpg 265w, https://bloganchoi.com/wp-content/uploads/2017/04/set-aside-1-560x420.jpg 560w" sizes="(max-width: 640px) 100vw, 640px" /><figcaption id="caption-attachment-42097" class="wp-caption-text">Hai icon mới trên thanh Tab Bar chính là hai phím để quản lý Tab kiểu mới (ảnh: Internet)</figcaption></figure>
<p><span style="font-weight: 400;">Set aside sẽ rất hữu ích với những người mở nhiều Tab một lúc nhưng chỉ thực sự đang làm việc trên một số Tab và có ý định sử dụng các Tab còn lại sau đó. Set aside sẽ giúp gom các tab chưa sử dụng sang một bên giúp người dùng thao tác được thuận lợi hơn. Có thể thấy </span><span style="font-weight: 400;">Microsoft </span><span style="font-weight: 400;">đã rất tâm lý khi tích hợp tính năng này trên </span><span style="font-weight: 400;">Microsoft Edge 15</span><span style="font-weight: 400;">.</span></p>
<h2><b>Tính năng Tab preview</b></h2>
<p><span style="font-weight: 400;">Tab preview hay còn gọi là Xem trước thẻ duyệt. Thực chất tính năng này là một cải tiến của phiên bản </span><span style="font-weight: 400;">Microsoft</span><span style="font-weight: 400;"> Edge 14. Trước đó tại phiên bản cũ, chúng ta đã không còn lạ lẫm với việc khi rê chuột lên một thẻ Tab bất kỳ, ngay lập tức tại thẻ Tab đó sẽ xổ ra một cửa sổ nhỏ bên dưới nhằm minh họa cho nội dung thẻ Tab ta đang trỏ chuột tới.</span></p>
<figure id="attachment_42099" aria-describedby="caption-attachment-42099" style="width: 640px" class="wp-caption aligncenter"><img loading="lazy" class="size-full wp-image-42099" src="https://bloganchoi.com/wp-content/uploads/2017/04/tab-preview-bar-1.jpg" alt="Tính năng Tab preview trên Microsoft Edge 15" width="640" height="480" srcset="https://bloganchoi.com/wp-content/uploads/2017/04/tab-preview-bar-1.jpg 640w, https://bloganchoi.com/wp-content/uploads/2017/04/tab-preview-bar-1-300x225.jpg 300w, https://bloganchoi.com/wp-content/uploads/2017/04/tab-preview-bar-1-80x60.jpg 80w, https://bloganchoi.com/wp-content/uploads/2017/04/tab-preview-bar-1-265x198.jpg 265w, https://bloganchoi.com/wp-content/uploads/2017/04/tab-preview-bar-1-560x420.jpg 560w" sizes="(max-width: 640px) 100vw, 640px" /><figcaption id="caption-attachment-42099" class="wp-caption-text">Tính năng Tab preview trước đây trên Microsoft Edge 14 chỉ xem trước được từng Tab</figcaption></figure>
<p><span style="font-weight: 400;">Trên </span><span style="font-weight: 400;">Microsoft Edge 15</span><span style="font-weight: 400;"> lần này, </span><span style="font-weight: 400;">Microsoft</span><span style="font-weight: 400;"> đã tích hợp một phím mũi tên trên thanh Tab Bar &#8211; ngay cạnh phím thêm Tab mới. Khi người dùng nhấn vào phím mũi tên này, tất cả các Tab trên trình duyệt sẽ hiện ra một cửa sổ minh họa nội dung bên dưới giúp người dùng dễ dàng phân biệt được các Tab với nhau.</span></p>
<figure id="attachment_42098" aria-describedby="caption-attachment-42098" style="width: 640px" class="wp-caption aligncenter"><img loading="lazy" class="size-full wp-image-42098" src="https://bloganchoi.com/wp-content/uploads/2017/04/tab-preview-bar-2-windows-central.jpg" alt="Tính năng Tab preview trên Microsoft Edge 15" width="640" height="480" srcset="https://bloganchoi.com/wp-content/uploads/2017/04/tab-preview-bar-2-windows-central.jpg 640w, https://bloganchoi.com/wp-content/uploads/2017/04/tab-preview-bar-2-windows-central-300x225.jpg 300w, https://bloganchoi.com/wp-content/uploads/2017/04/tab-preview-bar-2-windows-central-80x60.jpg 80w, https://bloganchoi.com/wp-content/uploads/2017/04/tab-preview-bar-2-windows-central-265x198.jpg 265w, https://bloganchoi.com/wp-content/uploads/2017/04/tab-preview-bar-2-windows-central-560x420.jpg 560w" sizes="(max-width: 640px) 100vw, 640px" /><figcaption id="caption-attachment-42098" class="wp-caption-text">Tính năng Tab preview mới sẽ giúp người dùng xem trước nội dung của tất cả các Tab đang chạy trên trình duyệt (ảnh: WindowsCentral)</figcaption></figure>
<p><span style="font-weight: 400;">So với phiên bản trước chúng ta chỉ xem được nội dung minh họa của từng Tab mỗi khi rê chuột lên Tab ấy, nhưng với phiên bản mới này chỉ cần một nút bấm ta có thể xem được cùng một lúc tất cả các Tab đang được mở. </span><span style="font-weight: 400;">Thực chất trên nhiều trình duyệt như Opera hay Vivaldi tính năng này đã có từ lâu, nhưng với sự bổ sung này của </span><span style="font-weight: 400;">Microsoft</span><span style="font-weight: 400;"> sẽ càng làm </span><span style="font-weight: 400;">Microsoft Edge 15</span><span style="font-weight: 400;"> trở lên tiện ích hơn cho người dùng. </span></p>
<h2><b>Cải thiện tính năng đọc sách</b></h2>
<p><span style="font-weight: 400;">Chế độ đọc sánh trên </span><span style="font-weight: 400;">Microsoft Edge</span><span style="font-weight: 400;"> có lẽ là tính năng được nhiều người yêu thích nhất. Trên phiên bản mới </span><span style="font-weight: 400;">Microsoft Edge 15</span><span style="font-weight: 400;"> lần này, </span><span style="font-weight: 400;">Microsoft</span><span style="font-weight: 400;"> tiếp tục nâng cấp thêm cho tính năng này làm nó càng trở lên hữu ích hơn.</span></p>
<figure id="attachment_42094" aria-describedby="caption-attachment-42094" style="width: 640px" class="wp-caption aligncenter"><img loading="lazy" class="size-full wp-image-42094" src="https://bloganchoi.com/wp-content/uploads/2017/04/microsoft-edge-read-mode-1.jpg" alt="Chế độ đọc sách trên trình duyệt Microsoft Edge 15" width="640" height="480" srcset="https://bloganchoi.com/wp-content/uploads/2017/04/microsoft-edge-read-mode-1.jpg 640w, https://bloganchoi.com/wp-content/uploads/2017/04/microsoft-edge-read-mode-1-300x225.jpg 300w, https://bloganchoi.com/wp-content/uploads/2017/04/microsoft-edge-read-mode-1-80x60.jpg 80w, https://bloganchoi.com/wp-content/uploads/2017/04/microsoft-edge-read-mode-1-265x198.jpg 265w, https://bloganchoi.com/wp-content/uploads/2017/04/microsoft-edge-read-mode-1-560x420.jpg 560w" sizes="(max-width: 640px) 100vw, 640px" /><figcaption id="caption-attachment-42094" class="wp-caption-text">Người dùng có thể xem mục lục các chương, xem các trang đã đánh dấu hay tìm kiếm nội dung trong sách một cách trực quan hơn (Ảnh: Internet)</figcaption></figure>
<p><span style="font-weight: 400;">Chế độ đọc sách trên </span><span style="font-weight: 400;">Microsoft Edge</span><span style="font-weight: 400;"> đã chuyên nghiệp hơn giúp nó giống với một ứng dụng đọc sách chuyên dụng. Người dùng có thể xem </span><span style="font-weight: 400;">mục lục các chương sách, xem các trang đã đánh dấu hay tìm kiếm nội dung trong sách một cách trực quan hơn do </span><span style="font-weight: 400;">Microsoft</span><span style="font-weight: 400;"> đã thiết kế lại giao diện. Hay người dùng đã có thể tùy chỉnh kích thước chữ, loại chữ, khoảng cách các chữ với nhau và đổi được màu của trang sách theo ý muốn. Ngoài ra, </span><span style="font-weight: 400;">Microsoft Edge 15</span><span style="font-weight: 400;"> đã hỗ trợ thêm việc đọc sách trên định dạng .EPUB và cho phép người dùng mua sách trực tiếp qua Windows Store.</span></p>
<figure id="attachment_42095" aria-describedby="caption-attachment-42095" style="width: 640px" class="wp-caption aligncenter"><img loading="lazy" class="size-full wp-image-42095" src="https://bloganchoi.com/wp-content/uploads/2017/04/microsoft-edge-read-mode-2.jpg" alt="Chế độ đọc sách trên trình duyệt Microsoft Edge 15" width="640" height="480" srcset="https://bloganchoi.com/wp-content/uploads/2017/04/microsoft-edge-read-mode-2.jpg 640w, https://bloganchoi.com/wp-content/uploads/2017/04/microsoft-edge-read-mode-2-300x225.jpg 300w, https://bloganchoi.com/wp-content/uploads/2017/04/microsoft-edge-read-mode-2-80x60.jpg 80w, https://bloganchoi.com/wp-content/uploads/2017/04/microsoft-edge-read-mode-2-265x198.jpg 265w, https://bloganchoi.com/wp-content/uploads/2017/04/microsoft-edge-read-mode-2-560x420.jpg 560w" sizes="(max-width: 640px) 100vw, 640px" /><figcaption id="caption-attachment-42095" class="wp-caption-text">Microsoft Edge 15 đã hỗ trợ người dùng mua sách trực tiếp qua Windows Store (Ảnh: Internet)</figcaption></figure>
<p><span style="font-weight: 400;">Điểm ấn tượng nhất phải kể đến tính năng Text-To-Speech trong chế độ đọc sách. Người dùng có thể nhờ máy tính đọc thành tiếng cuốn sách cho mình nghe nếu không muốn phải tự đọc. Hiện tại tính năng thú vị này đã hỗ trợ nhiều ngôn ngữ, chúng ta có thể hy vọng Tiếng Việt sẽ được </span><span style="font-weight: 400;">Microsoft Edge</span><span style="font-weight: 400;"> hỗ trợ trong tương lai.</span></p>
<h2><b>Một số tính năng khác</b></h2>
<p><span style="font-weight: 400;">Microsoft Edge 15</span><span style="font-weight: 400;"> cũng được cập nhập thêm rất nhiều tính năng khác. Trong đó phải kể đến tính năng Import Bookmark trở lên hiệu quả hơn khi nó có thể tự phát hiện các trình duyệt khác trên máy tính có Bookmark mới, </span><span style="font-weight: 400;">Microsoft Edge 15</span><span style="font-weight: 400;"> sẽ tự động thông báo người dùng Import Bookmark ngay khi phát hiện chỉ bằng một nút bấm.</span></p>
<p><span style="font-weight: 400;">Hay từ nay Adobe Flash trên </span><span style="font-weight: 400;">Microsoft Edge 15</span><span style="font-weight: 400;"> sẽ được tắt mặc định tại các trang có nội dung Flash. Nếu muốn chạy nội dung Flash thì bạn phải nhấp vào một biểu tượng hình mảnh ghép (Plug-in) nằm trên thanh địa chỉ. Và còn rất nhiều cải thiện khác về hiệu năng sử dụng cũng như thay đổi và sửa lỗi nhỏ khác trên </span><span style="font-weight: 400;">Microsoft Edge 15</span><span style="font-weight: 400;">.</span></p>
<p><span style="font-weight: 400;">Hãy tiếp tục theo dõi BlogAnChoi để cập nhập những tin tức mới nhất về công nghệ nhé!</span></p>]]></content>
		
					<link rel="replies" type="text/html" href="https://bloganchoi.com/trinh-duyet-microsoft-edge-15-co-them-nhieu-tinh-nang-moi/#comments" thr:count="1" />
			<link rel="replies" type="application/atom+xml" href="https://bloganchoi.com/trinh-duyet-microsoft-edge-15-co-them-nhieu-tinh-nang-moi/feed/atom/" thr:count="1" />
			<thr:total>1</thr:total>
			</entry>
	</feed>